Linking with Office Word for your Portfolio Interview


1. Open your Portfolio Audit Inventory sheet word file

(Make sure it’s already in your Dropbox folder)


2. Place the evidence document you want to link into your shared Dropbox folder

(Do this by going to Dropbox in your folders section rather than online at www.dropbox.com)


  • You may chose to organize your documents into folders at this point (if you move them later the link will not work properly)


3. Go to Insert in your inventory document, then click the Hyperlink button

4. Choose the file in your Dropbox shared folder

  • Click the Browse for File icon near the right side of the window (it has a picture of a folder opening on it)

Select the file you want and press OK


5. Test the link (Ctrl+Click) to make sure it works


Creating a Shared Dropbox Folder for your Portfolio Interview

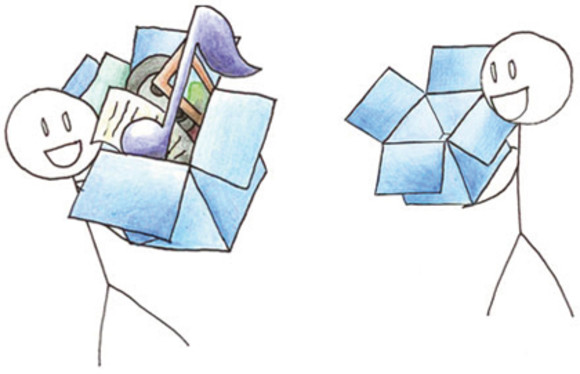
Dropbox File Sharing
Image from: http://www.techradar.com/news/internet/essential-tips-for-every-dropbox-user-679020


1. Go to www.dropbox.com


2. Sign in


3. Click on Sharing button on left-hand side


4. Click on New shared folder (near right-hand side)


5. I’d like to create and share a new folder should be pre-selected


6. Name your folder with your first name and last initial.


7. Click next


8. Invite collaborators to this folder

Type in the email address(s) of the person/people you want to share the folder with.


9. Click Share folder

You should now see the new folder in your Dropbox under Sharing


10. Move your Portfolio Audit Inventory sheets into this folder as well as the documents you will use as evidence for your portfolio

If you already have your files in another folder, simply cut and paste them into your new shared folder, then you can delete the old one.


Make sure

a)     your evidence documents are in the folder

b)     they are organized

before you link them in your inventory sheet.  If you do either of these after, the links will not work properly.


Wednesday, January 23rd 2013

On Monday we successfully sub-cultured 5 plates of physarum polycephalum.  

We started by melting a bottle of 2% non-nutrient agar in a pot of water.  We had to start of with the water and the bottle of solid agar at the same temperature, gradually warming them up so the glass agar bottle wouldn’t break.  We also unscrewed the bottle cap most of the way so air could get in and out.  Once it was fully liquefied, we took the bottle out and waited for it to cool enough to pour.  We then poured the agar into 5 petri dishes, opening them only long enough to pour the agar in to avoid contamination.  We kept the lids on for about 30 minutes while waiting for the agar to set, then prepared to sub-culture from our plate of growing mould.

We ended up having to sterilize the X-Acto knife blade three times (it got dropped, etc.) due to worrying we might contaminate the mould – kind of ironic if you ask me.  Once the agar was set and we were ready to subculture, I carefully cut 5 small cubes from our growing culture, placing them upside-down into the petri dishes.  We took 2 squares with the oat flakes they were already eating, 2 squares without that we placed directly on top of oat flakes, and 1 that we placed with no oat flakes directly touching it.

From the results so far, the ones we took with oats they were feeding on are growing the best, followed by the ones we put directly on top of an oat flake.  The one we took by itself that was not originally touching an oat flake has not grown as much but is still alive and well, from the looks of it.

My partner also replaced some of the oat flakes our original culture was eating because they looked like they were either a bit mouldy (with a different type of mould) or might soon get mouldy, as we read that physarum polycephalum will leave old oat flakes for new ones, which can lead to older ones getting contaminated by other fungi.

Yesterday we prepared another 10 petri dishes with plain 2% agar for future use, putting 5 of them at room temperature and 4 in the fridge.  The last one we left out, with the lid off in the science room so we could see if anything (that might land on it from the air) grows on it.  So far nothing has, and considering how well the mould is doing it seems less finicky than we originally thought.  The non-nutrient agar is working great, and the mould is growing just fine!

Today we put one of the 5 sub-cultured cultures into the fridge so we can see how much impact the cold has on its growth speed.  By comparing it to the others, we hope to determine if we can leave it in the fridge over the weekend without it growing too much.

Friday, January 18th 2013

The slime mould kit we ordered arrived on Wednesday afternoon, but we are sill awaiting the incubator and other supplies.  The mould will be left in the fridge for the weekend, and hopefully on Monday the incubator will arrive and we can start growing the mould.  Once the culture is large enough, we hope to subculture it, and that way if one plate dies or becomes contaminated, we’ll still have some to work with.  First we’re going to experiment with growing the mould, keeping it alive, sub-culturing it, and transferring it to and from its dormant stage.  Then we’re going to try to work out how to set up the maze so we can test how long it takes to get through it.

Wednesday, January 16th 2013

Yesterday my partner and I went to the dollar store and picked up a few supplies for our inquiry project.  We got Tupperware containers (to put the petri dishes in),  white paper towels (to keep the mould damp), filtered water (which may or may not work – we might have to try distilled water), and a maze.  We are now trying to figure out if the maze we got can be used or if we will need to make another maze ourselves.


The walls of the plastic maze we found are actually connected to the lid of the maze rather than the bottom, so we might have to try making one ourselves.  One idea is to fill the base of the maze with agar up to the point where the walls will meet it, and another is to flip the maze upside down and pour a very thin layer of agar into it.  The maze needs a layer of non-nutritional agar so the mould has a good surface to climb on.    Non-nutritional agar is the better choice, because if we were to use nutritional agar, other organisms might grow, contaminating the mould.


We also had a suggestion to make the maze out of lego blocks.  Any equipment we use for the mould will need to be sterilized, so lego seems to be a good choice, but we think the maze might end up being too large if we use lego.


Last Friday Mr. Sarte ordered petri dishes, scalples, an incubator, and a slime mould kit.  The kit will include some of the other pieces we need, such as foil to wrap the petri dishes in (they need to be kept in a dark, damp environment) and oats to feed the mould with.  We are hoping the incubator will arrive by tomorrow as Friday is a non-instructional day.  Our plan is to test the incubator and get everything set up so it will be ready for when the mould gets here.


First we want to experiment a bit with growing and keeping the mould alive, starting new cultures, and transferring the mould to and from its dormant stage.  Once we get used to growing the mould, then we want to try putting it through a simple maze.